RAD Registry Prep logo

Fluoro & OR Guide

C-arm basics

The C-arm is a mobile fluoroscopy unit: an x-ray tube on one end of a C-shaped arm and an image receptor on the other, wired to a monitor cart. In surgery you run it for the surgeon, so knowing how it moves and how to keep dose down is most of the job.

What the ARRT tests

  • Tube under the patient, receptor on top and as close to the patient as possible (less patient dose, less scatter to your head and neck, less magnification).
  • Mobile fluoroscopy: source-to-skin distance at least 30 cm (12 inches).
  • Entrance exposure rate limit: 88 mGy/min (10 R/min) normal mode; 176 mGy/min (20 R/min) in high-level control.
  • The 5-minute timer is a reminder of beam-on time; it must be reset.
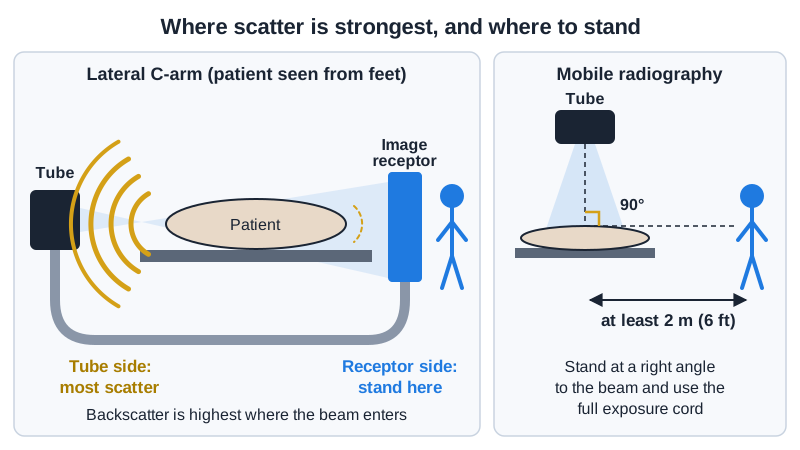
  • Stand on the receptor side: scatter is highest where the beam enters the patient (the tube side).
  • Pulsed fluoroscopy and last-image hold cut dose; magnification modes raise it.

The basics

The parts

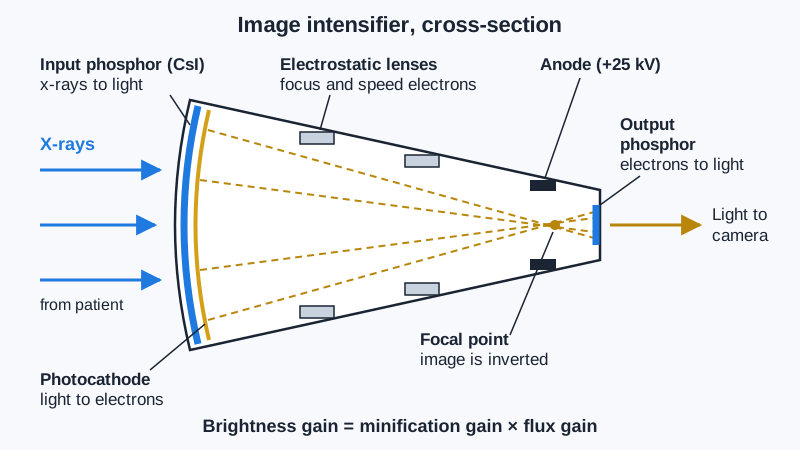
  • C-arm: x-ray tube on one end, image receptor on the other. Older units use an image intensifier (round field); newer ones a flat-panel detector (square field, no distortion at the edges).
  • Monitor cart (workstation): the screens, saved images, dose readout, and the cable to the C-arm. Some units send images straight to PACS.
  • Hand switch or foot pedal: one pedal for live fluoro, often a second for a saved spot or boost image.
  • Laser aimer: a crosshair that shows where the beam's center will land before you shoot.

The movements (each has a brake)

  • Up and down: the column raises or lowers the whole C.
  • In and out: the horizontal arm slides the C toward or away from the patient.
  • Orbital rotation: the C slides around its own track, from AP toward lateral.
  • Angular (lateral) rotation: the C rolls about the horizontal arm, tilting the beam cephalad or caudad.
  • Wig-wag: the C swings side to side about the column, sweeping along the patient without moving the base.
  • Brakes are usually color-coded. Unlock only the motion you need, move, then lock it again so the image doesn't drift.

Dose modes and controls

  • Pulsed fluoro: short pulses instead of a continuous beam. Fewer pulses per second, less dose.
  • Last-image hold (LIH): the last frame stays on the screen, so the surgeon can study it without more beam-on time.
  • Automatic brightness control (ABC / AERC): raises kVp and mA through thick parts. The obese hip lateral is where dose climbs fastest.
  • Magnification modes: a smaller field of view on an image intensifier means more dose. Use only when the surgeon needs the detail.
  • Collimate to the part. It lowers dose and scatter and gives a better image.
  • Image rotate and flip: set the monitor so the image matches what the surgeon sees on the table. Confirm it before the case starts.

Your job

  • Warm up and test the unit before the patient arrives; check that the monitor cart and C-arm talk to each other and that the patient's information is entered.
  • Clean the C-arm with the hospital disinfectant before and after every case.
  • Bring the C-arm in from the non-sterile side, park it where it can reach both views without bumping the table, and lock the wheels.
  • Get the surgeon's preferred AP and lateral before draping. Note the C-arm angles (or tape the floor) so you can return to them fast.
  • Run the C-arm on the surgeon's call, save the images they want, and record fluoro time and dose (air kerma or DAP) at the end.

Watch out for

  • Never let a non-sterile part of the C-arm swing over or touch the sterile field or drape.
  • Announce moves ("C-arm coming in", "going lateral") so the team can lift hands and instruments.
  • Hands in the beam: tell the surgeon if their hands are in the field during live fluoro.
  • Watch the cable and the base wheels: cords across the floor are a trip hazard for the whole team.
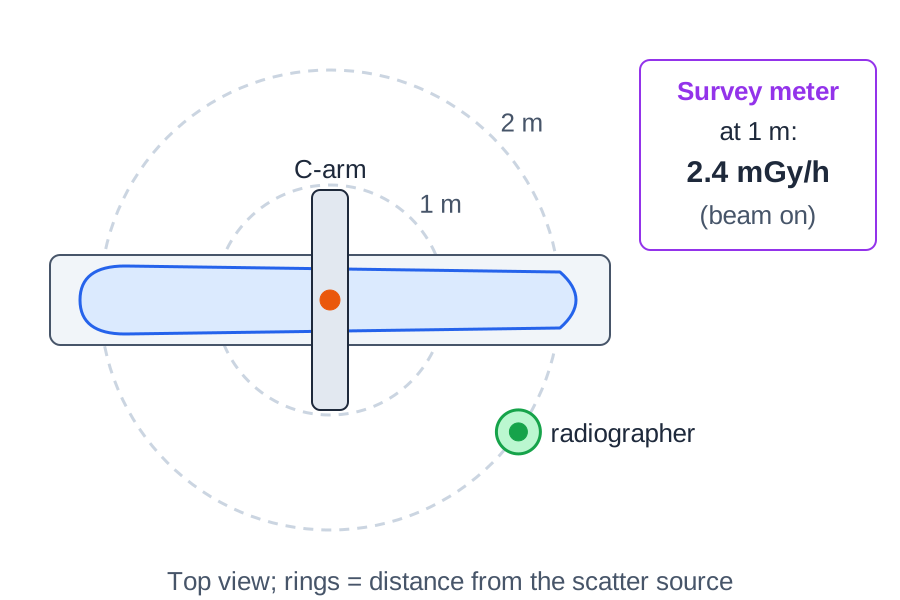
  • Wear a 0.5 mm Pb-equivalent apron and thyroid shield; badge at the collar, outside the apron. Step back between shots: distance is your best shield.

Tips from the room

  • Ask the surgeon at the start: "Do you want it oriented like you're looking at the patient?" Then flip or rotate once and leave it.
  • Keep both views in your head as positions to return to, not something to search for each time. Speed matters when the patient is open.
  • If the image is too dark or noisy on a big patient, move the receptor closer before you add technique.

Images

Scatter is strongest on the tube side. Stand on the receptor side.
Distance from the patient (the scatter source) cuts your dose fast.
Image intensifier vs flat-panel detector.

Quick check

1. During the fluoroscopic portion of a barium enema like the one shown, the patient lies on a fixed fluoroscopic table above an under-table x-ray tube. What is the minimum source-to-skin distance required for this unit?
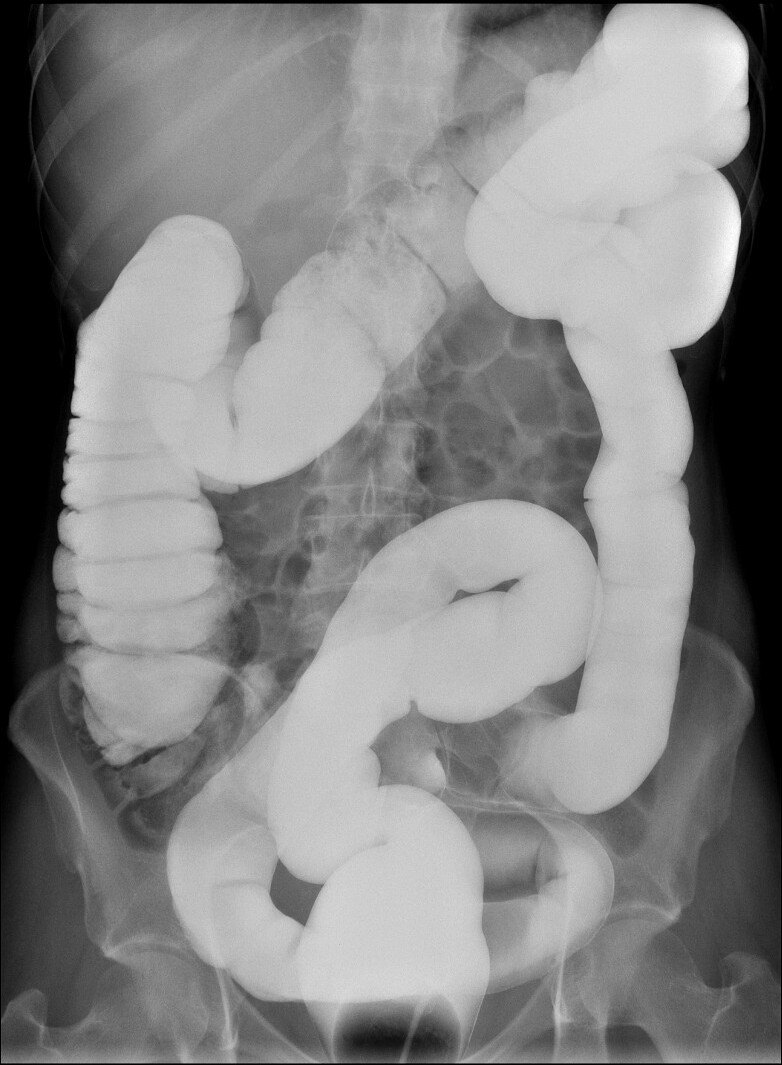

Image: Jmarchn. CC BY-SA 3.0.

2. Federal performance standards limit the air kerma rate of a fluoroscopy unit operating in normal mode (without high-level control) to a maximum of:

3. During an upper GI fluoroscopic exam with automatic brightness control (ABC), the radiologist moves the field from the lower esophagus to the thicker upper abdomen. How does the ABC respond?

4. Before a PICC placement, the radiographer takes a test fluoroscopic image. The patient's right side appears on the right side of the monitor, and the head appears at the bottom. What should the radiographer do?

5. During a C-arm spine case, the anesthesiologist stands at the head of the table, about 1.5 m from the beam, and asks whether a lead apron is really necessary. Which statement is correct?

Practice it in 3D

More in the guide