Routine chest imaging is an erect PA and left lateral at 72 inches, on full inspiration. The bony thorax (sternum, 12 pairs of ribs, thoracic vertebrae) has its own rib and sternum series at lower kVp.
Overview
Bones
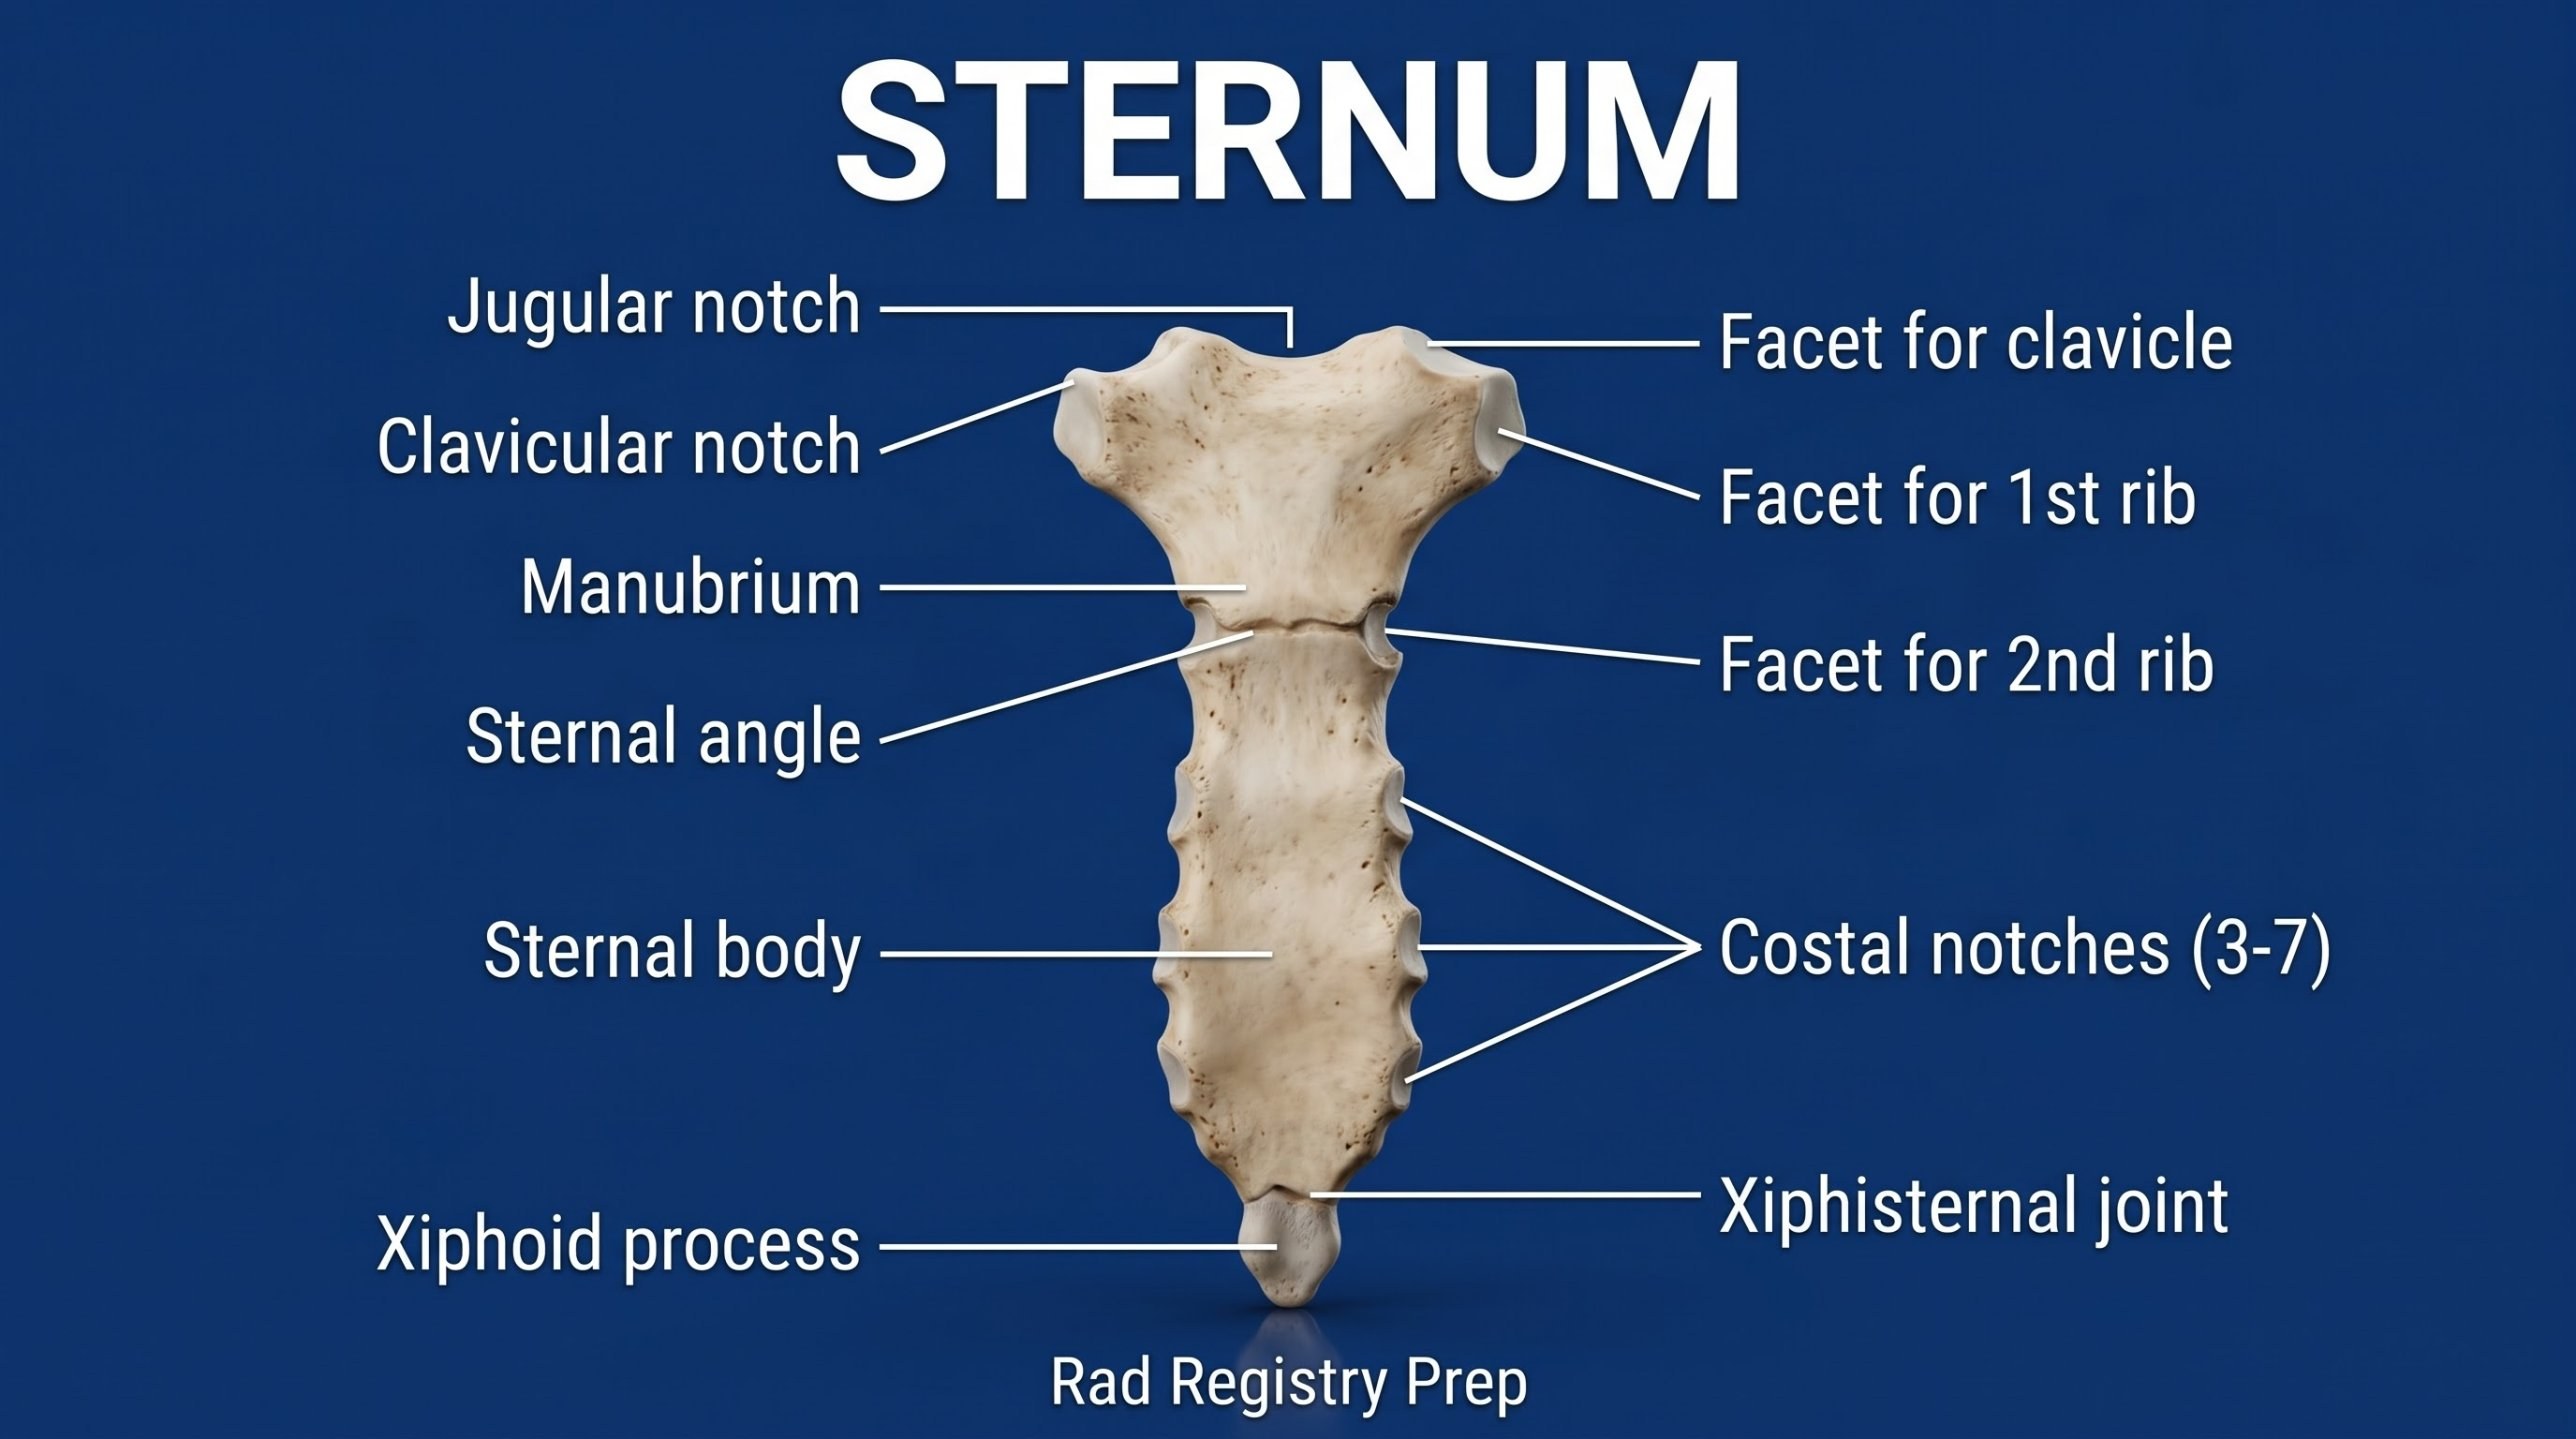
Sternum
Manubrium
Jugular notch
Sternal angle (T4–T5)
Body
Xiphoid process (T10)
Ribs
True ribs 1–7
False ribs 8–12
Floating ribs 11–12
Chest landmarks
Vertebra prominens (C7)
Jugular notch (T2–T3)
Inferior scapular angle (T7)
PA chest: center to T7, about 7–8 inches below the vertebra prominens (or at the inferior angles of the scapulae). Look for 10 posterior ribs above the diaphragm on a good inspiration.
Registry must-knows
PA rather than AP reduces heart magnification and breast dose; 72 inches reduces magnification further.
Shoulders rolled forward move the scapulae out of the lung fields.
Left lateral (unless the right side is of interest) puts the heart closer to the IR.
Lateral decubitus: affected side down for fluid, up for air; wait 5 minutes if possible.
Show 1 more
Ribs above the diaphragm: inspiration, about 70–80 kVp. Below the diaphragm: expiration, recumbent. Obliques elongate the axillary ribs (RPO/LPO for posterior injuries, RAO/LAO for anterior).
Erect, facing the IR, chin up, shoulders rolled forward and down; exposure on the second full inspiration.
Central ray
Perpendicular
Centering
T7 (inferior scapular angles)
Typical technique
110–125 kVp · 2–8 mAs · 72" SID
Image criteria
10 posterior ribs above the diaphragm.
No rotation: medial clavicle ends equidistant from the spine.
Scapulae out of the lung fields; costophrenic angles included.
Lateral sternum
CR: Perpendicular
Position
Erect if possible, lateral with the shoulders rolled back and the arms behind the back so the sternum is clear of the humeri.
Central ray
Perpendicular
Centering
Midsternum, halfway between the jugular notch and the xiphoid process
Typical technique
70–75 kVp · 10–15 mAs · 72" SID
Best shows
The whole sternum in profile: manubrium, body and xiphoid process, and displacement of a sternal fracture
Image criteria
Sternum in a true lateral, free of the ribs and humeri.
Jugular notch through the xiphoid process included.
Exposure on full inspiration at 72 inches SID to reduce magnification.
Sternoclavicular joints
PA, PA obliques, or serendipity (AP 40° cephalad)CR: PA: perpendicular at T2–T3. Oblique: perpendicular to the side of interest. Serendipity: 40° cephalad to the manubrium.
Position
PA: prone or erect facing the IR, both SC joints at once. PA oblique: rotate 10–15° toward the side of interest (the side nearest the IR). Serendipity: supine, both medial clavicles on one image.
Central ray
PA: perpendicular at T2–T3. Oblique: perpendicular to the side of interest. Serendipity: 40° cephalad to the manubrium.
Centering
T2–T3 (about 3 inches below the vertebra prominens) or the manubrium
Typical technique
70–75 kVp · 10–15 mAs · 40" SID
Best shows
The medial clavicles and the SC joints; on the serendipity view an anteriorly dislocated clavicle sits higher and a posteriorly dislocated one lower than the other side
Image criteria
Both SC joints and medial clavicles included.
Comparison of both sides on one image.
Exposure on suspended expiration.
Left lateral chest
CR: Perpendicular
Position
Erect, left side to the IR, arms raised over the head, MCP centered.
Central ray
Perpendicular
Centering
T7 at the midcoronal plane
Typical technique
110–125 kVp · 4–16 mAs · 72" SID
Image criteria
Posterior ribs nearly superimposed (no rotation).
Arms out of the lung fields.
Costophrenic angles and apices included.
AP chest (supine or portable)
CR: Perpendicular to the sternum (about 3–5° caudad if semi-erect, so it's perpendicular to the IR)
Position
Supine or semi-erect, IR behind the patient, as erect as the patient tolerates.
Central ray
Perpendicular to the sternum (about 3–5° caudad if semi-erect, so it's perpendicular to the IR)
Centering
3–4 inches below the jugular notch
Typical technique
80–90 kVp · 2–5 mAs · 40–72" SID
Image criteria
No rotation; clavicles horizontal.
As many ribs above the diaphragm as possible.
Label erect/semi-erect and the time on the image.
Lateral decubitus chest
CR: Horizontal, perpendicular to the IR
Position
Lying on the side, arms up; affected side down for fluid, up for air.
Central ray
Horizontal, perpendicular to the IR
Centering
T7
Typical technique
110–125 kVp · 4–12 mAs · 40–72" SID
Image criteria
Both sides of the chest included.
Air–fluid levels shown with the horizontal beam.
AP ribs above the diaphragm
CR: Perpendicular
Position
Erect if the patient can stand (supine if not), back against the IR for a posterior injury (PA for an anterior injury). Arms rotated so the scapulae move off the ribs. Full inspiration, held, to bring the diaphragm down.
Central ray
Perpendicular
Centering
T7, about 3–4 inches below the jugular notch; for one side, midway between the MSP and the lateral rib margin
Typical technique
70–80 kVp · 10–20 mAs · 40" SID
Best shows
Ribs 1–9 (or 10) above the diaphragm
Image criteria
Ribs 1–9 seen above the diaphragm.
Upper border about 1.5 inches above the shoulders.
Ribs seen through the lungs with a bone (low-kVp) technique.
AP ribs below the diaphragm
CR: Perpendicular
Position
Supine (recumbent), so the diaphragm rises and more lower ribs are below it. Full expiration, held.
Central ray
Perpendicular
Centering
Midway between the xiphoid process and the lower rib margin; for one side, midway between the MSP and the lateral rib margin. The bottom of the IR sits at the iliac crest.
Typical technique
75–85 kVp · 20–40 mAs · 40" SID
Best shows
Ribs 8–12 below the diaphragm, seen through the dense upper abdomen
Image criteria
Ribs 8–12 seen below the diaphragm.
Lower border at the iliac crest.
Higher technique than the upper ribs to penetrate the abdomen.
Oblique ribs (axillary ribs)
RPO / LPO or RAO / LAOCR: Perpendicular
Position
Body rotated 45°. Posterior injury: posterior oblique with the affected side DOWN (RPO for the right ribs). Anterior injury: anterior oblique with the affected side UP (LAO for the right ribs). Either way the spine rotates away from the side of interest.
Central ray
Perpendicular
Centering
Midway between the spine and the lateral edge of the affected side, at T7 for ribs above the diaphragm (T10 for below)
Typical technique
70–80 kVp · 10–20 mAs · 40" SID
Best shows
The axillary portion of the ribs, free of superimposition
Image criteria
Axillary ribs elongated and seen without overlap.
Spine shifted toward the side away from the injury.
Technique values are typical starting points; follow your department's technique chart.
Labeled diagrams
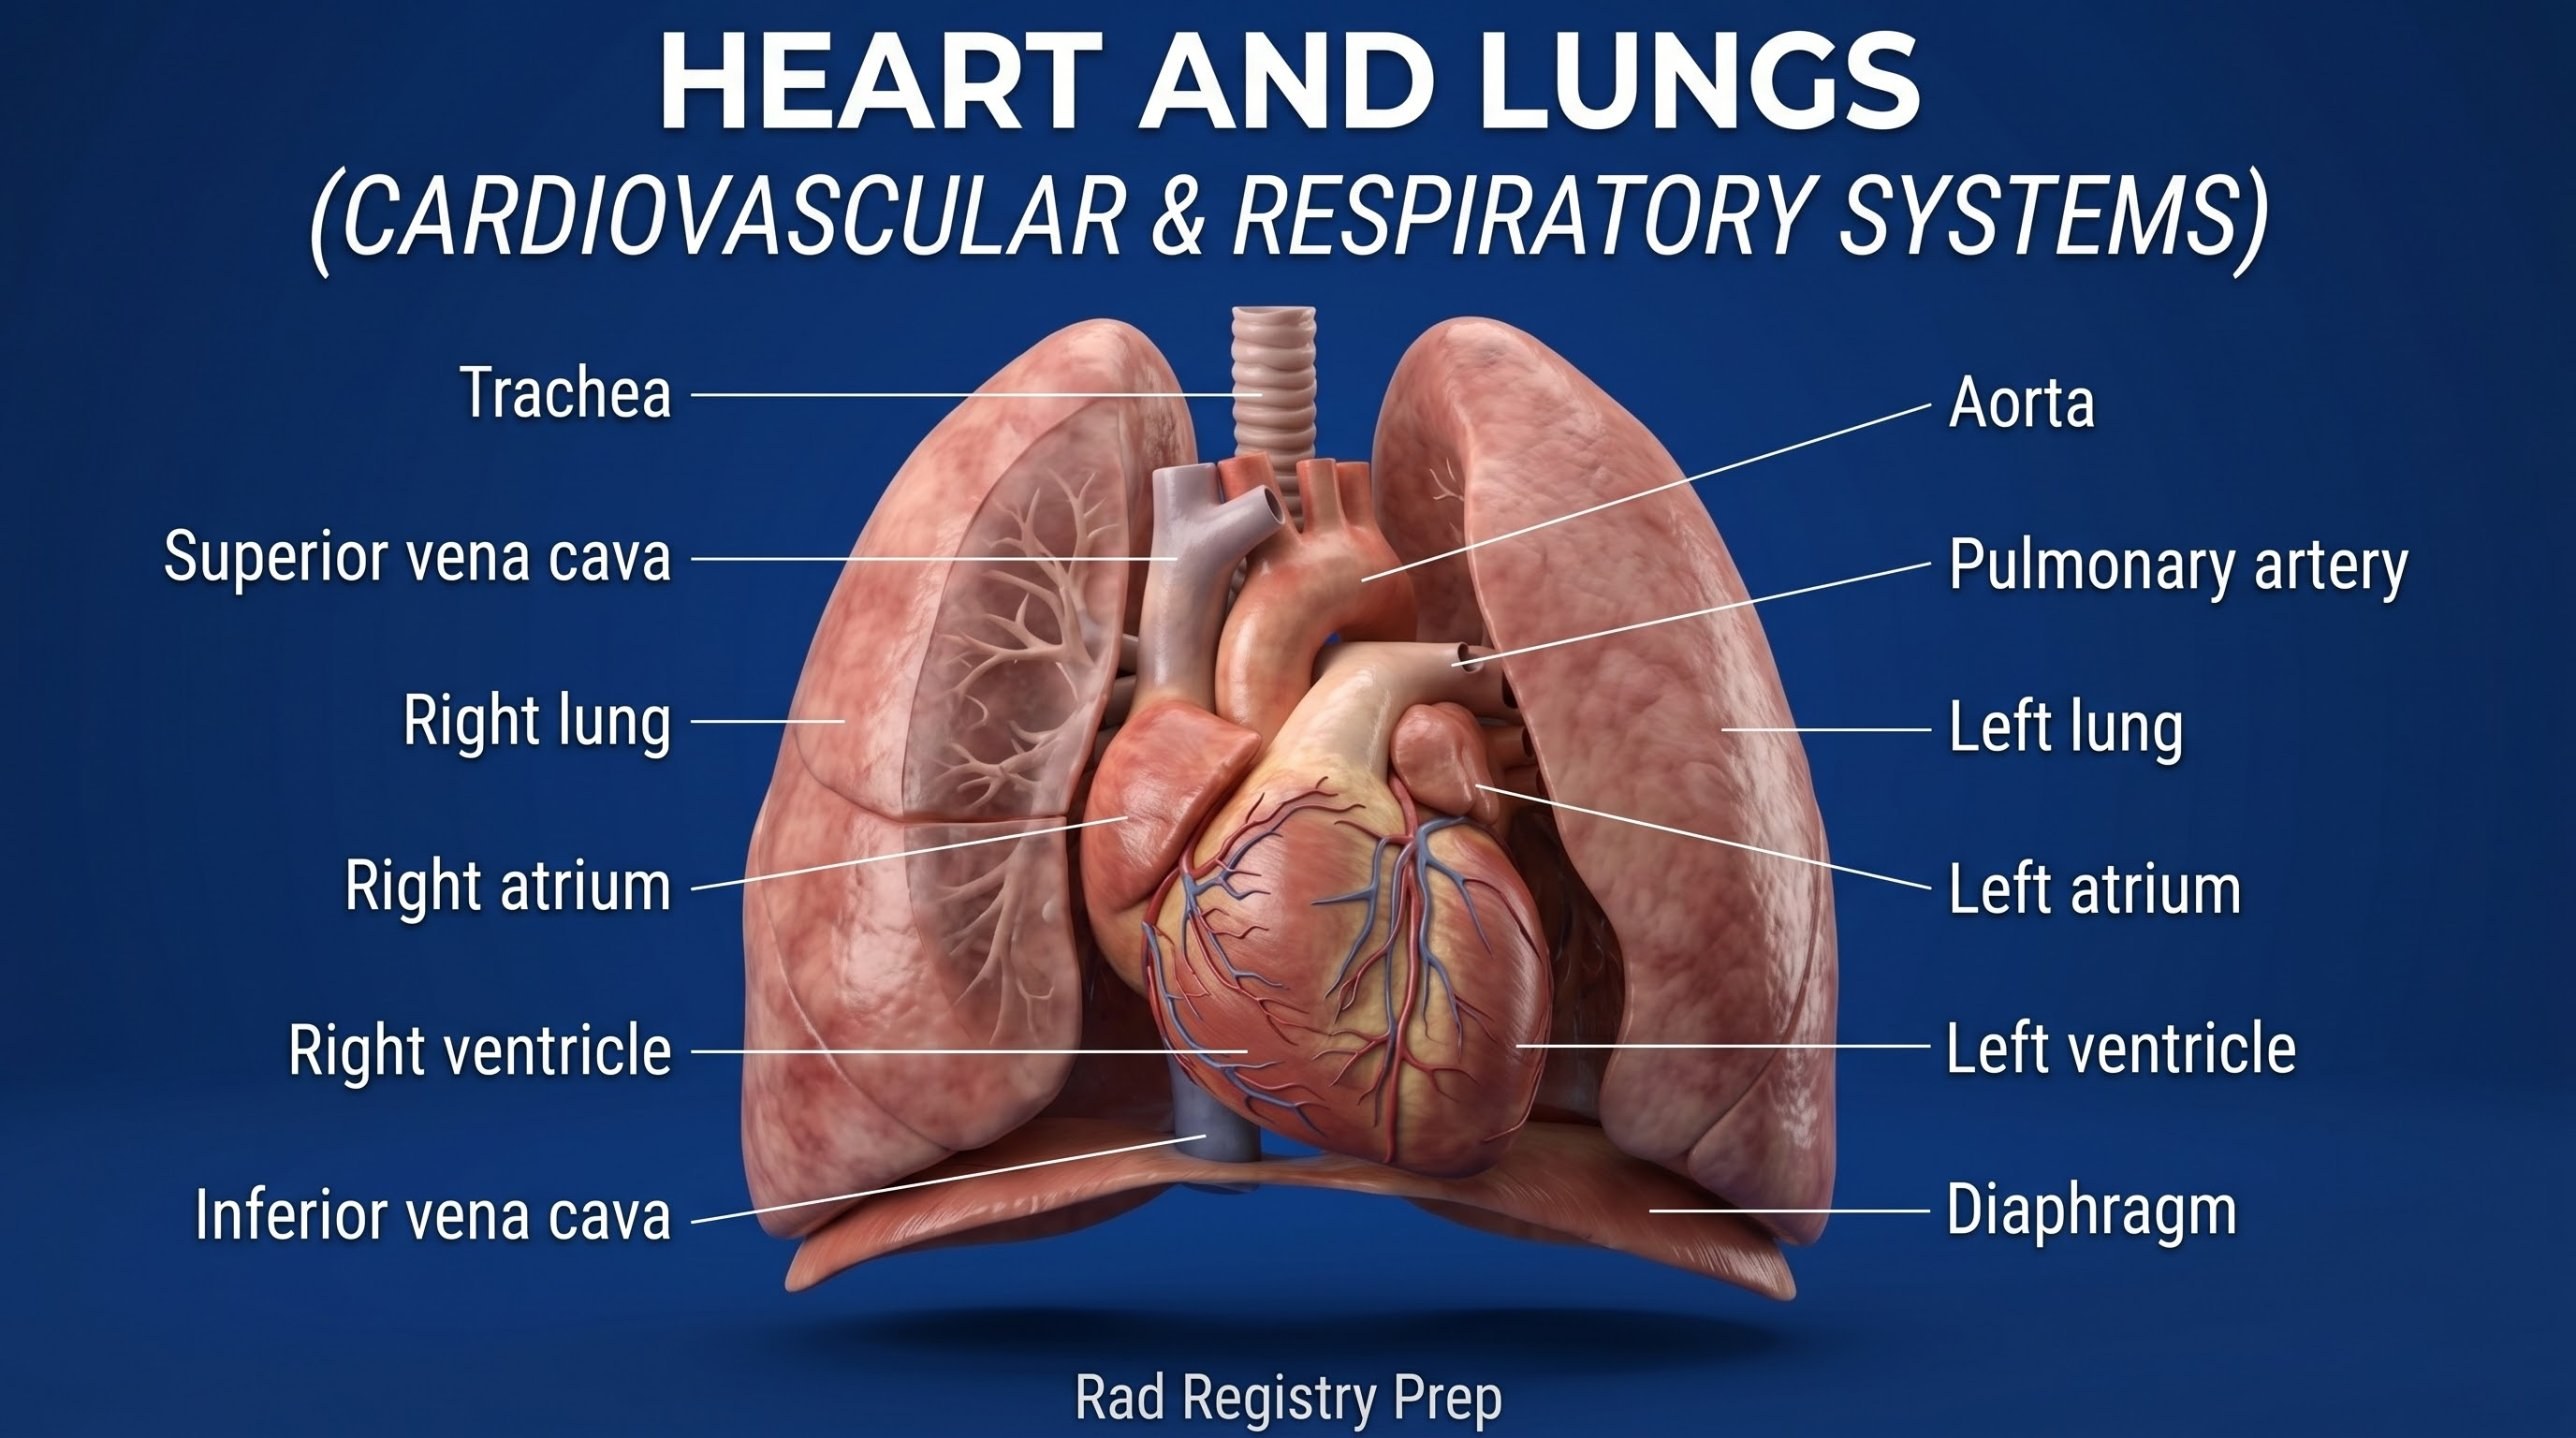
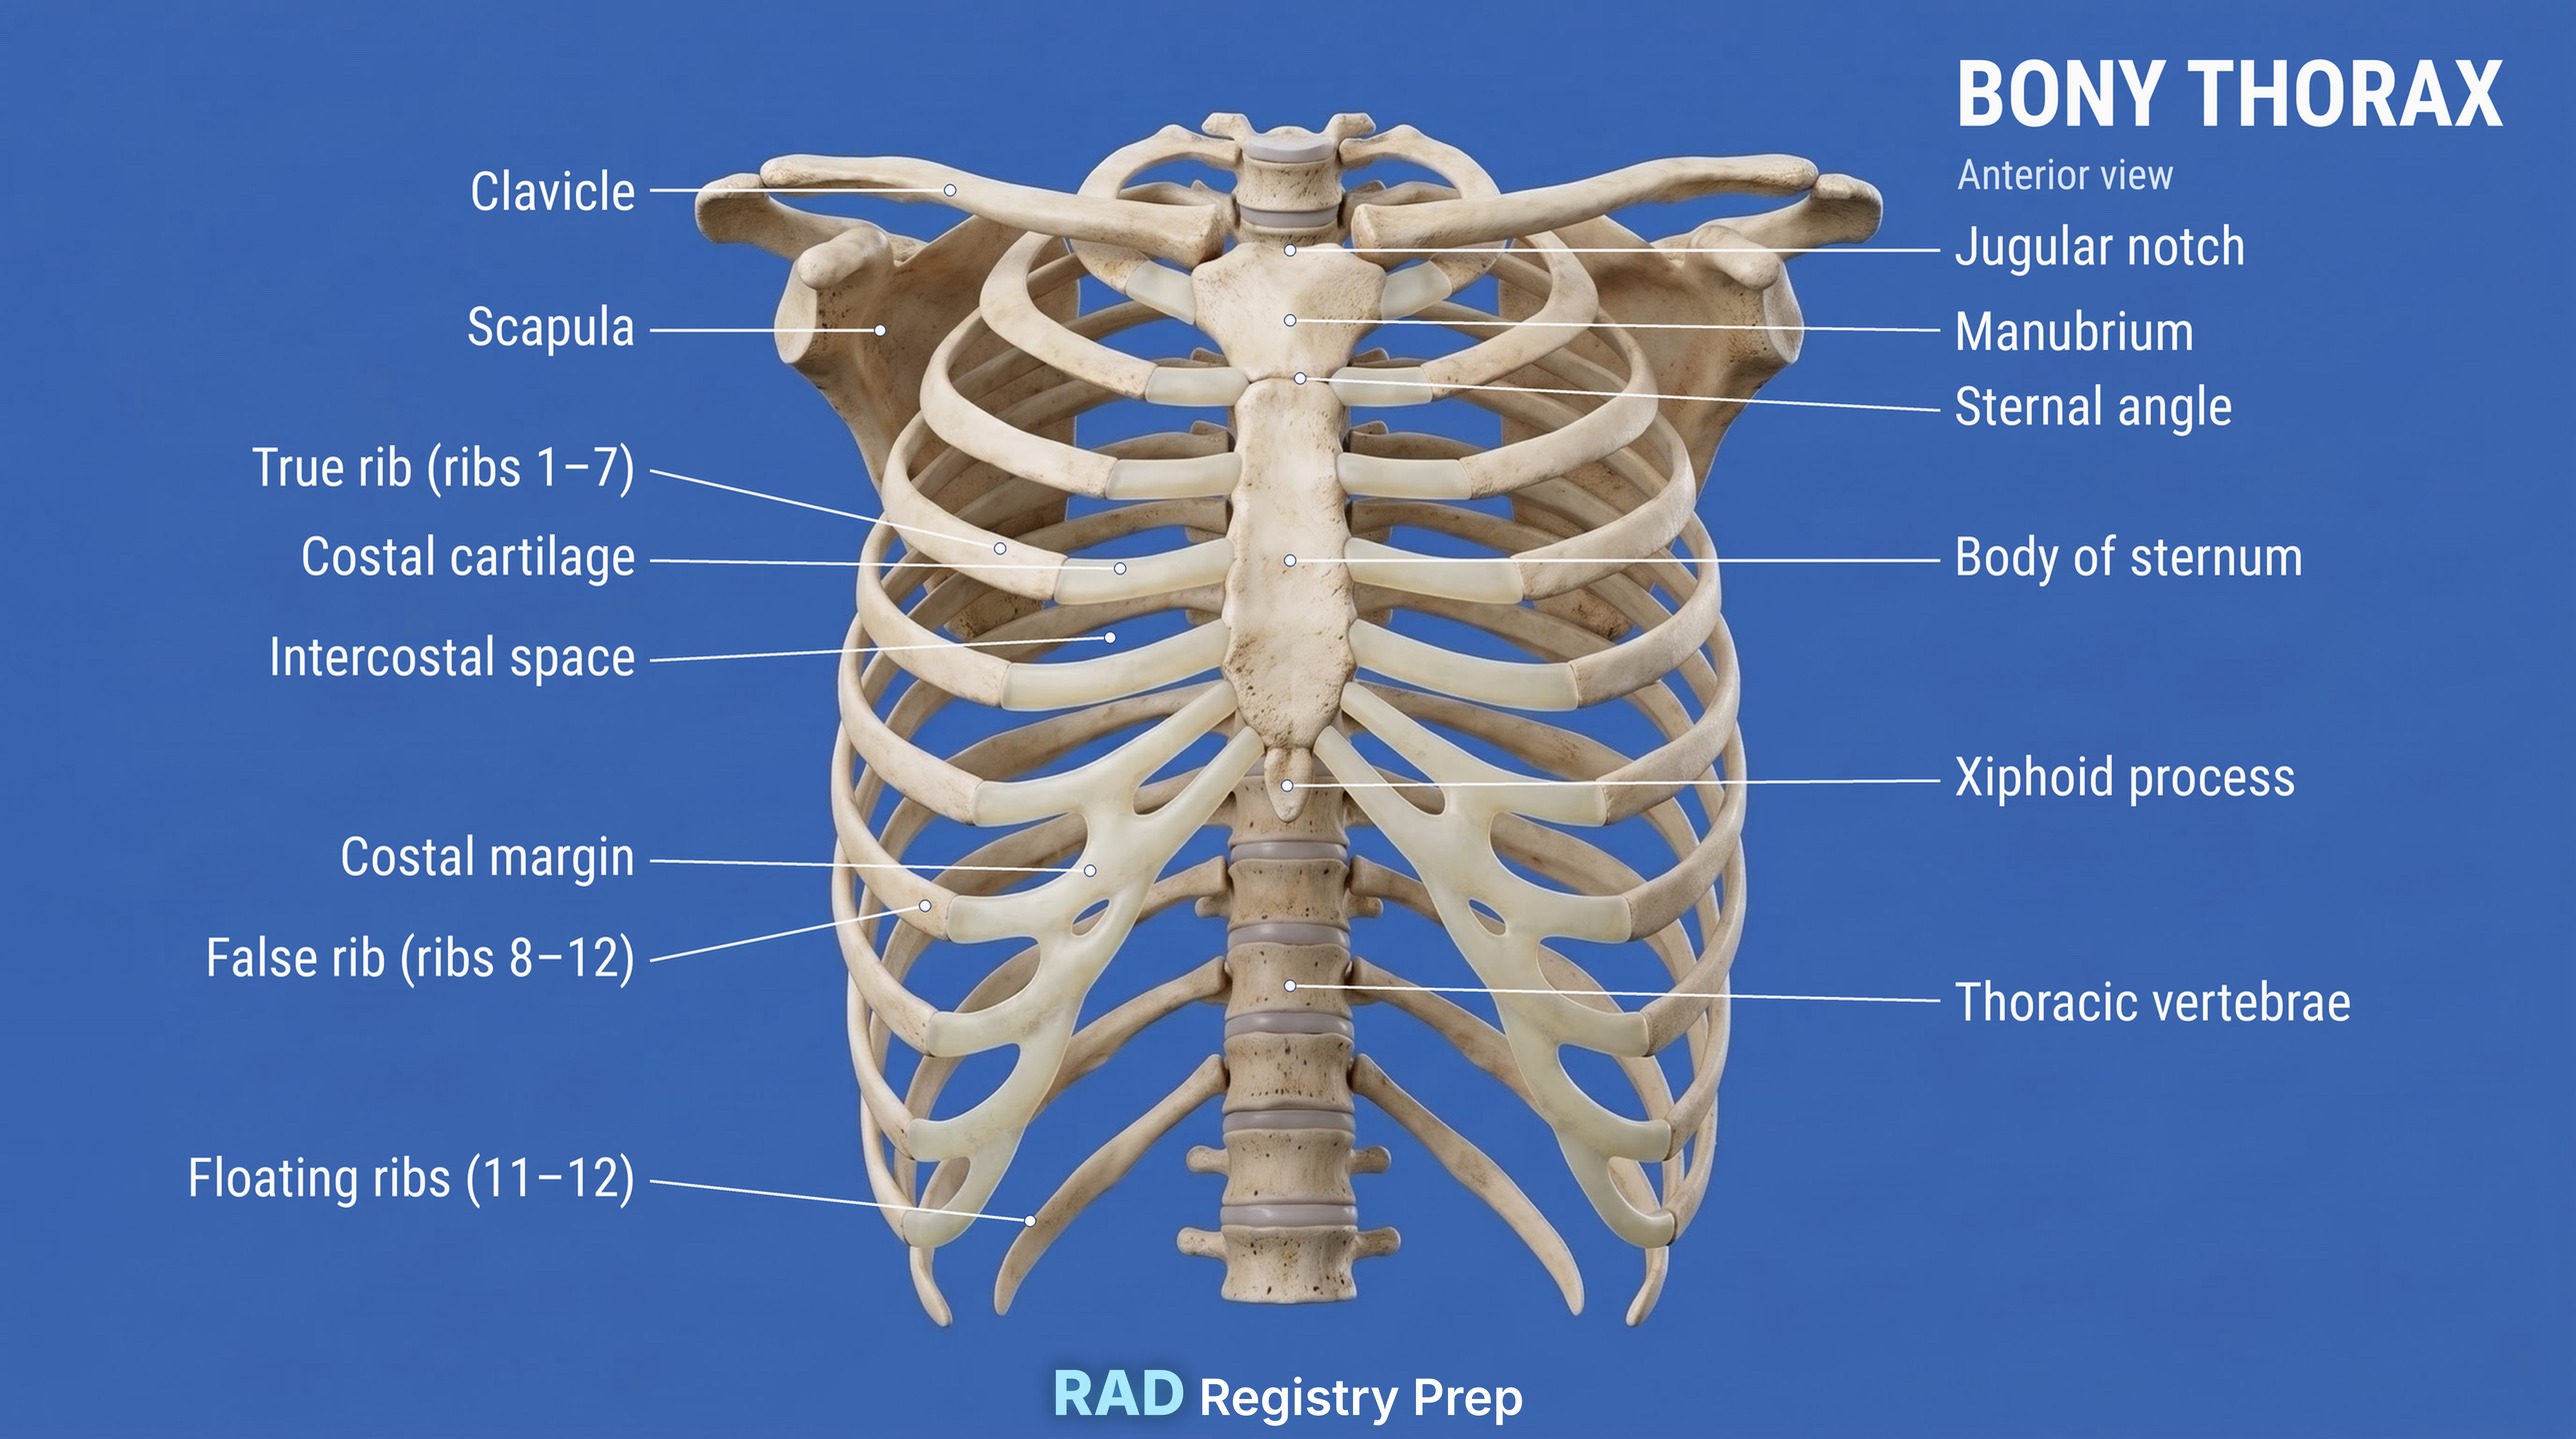
Heart and Lungs (anterior view) · Diagram: Rad Registry Prep (original illustration).Ribs and Bony Thorax (anterior view) · Diagram: Rad Registry Prep (original illustration).Sternum (anterior view) · Diagram: Rad Registry Prep (original illustration).
Quick check
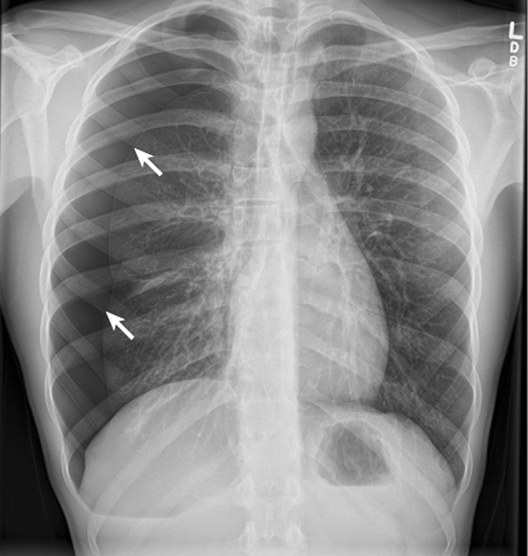
1. This PA chest radiograph shows a right pneumothorax (arrows). The follow-up chest must be done without the patient sitting or standing. Which position BEST demonstrates the pneumothorax?
Image: Bonilla et al., J Med Case Reports (2019). CC BY 4.0.
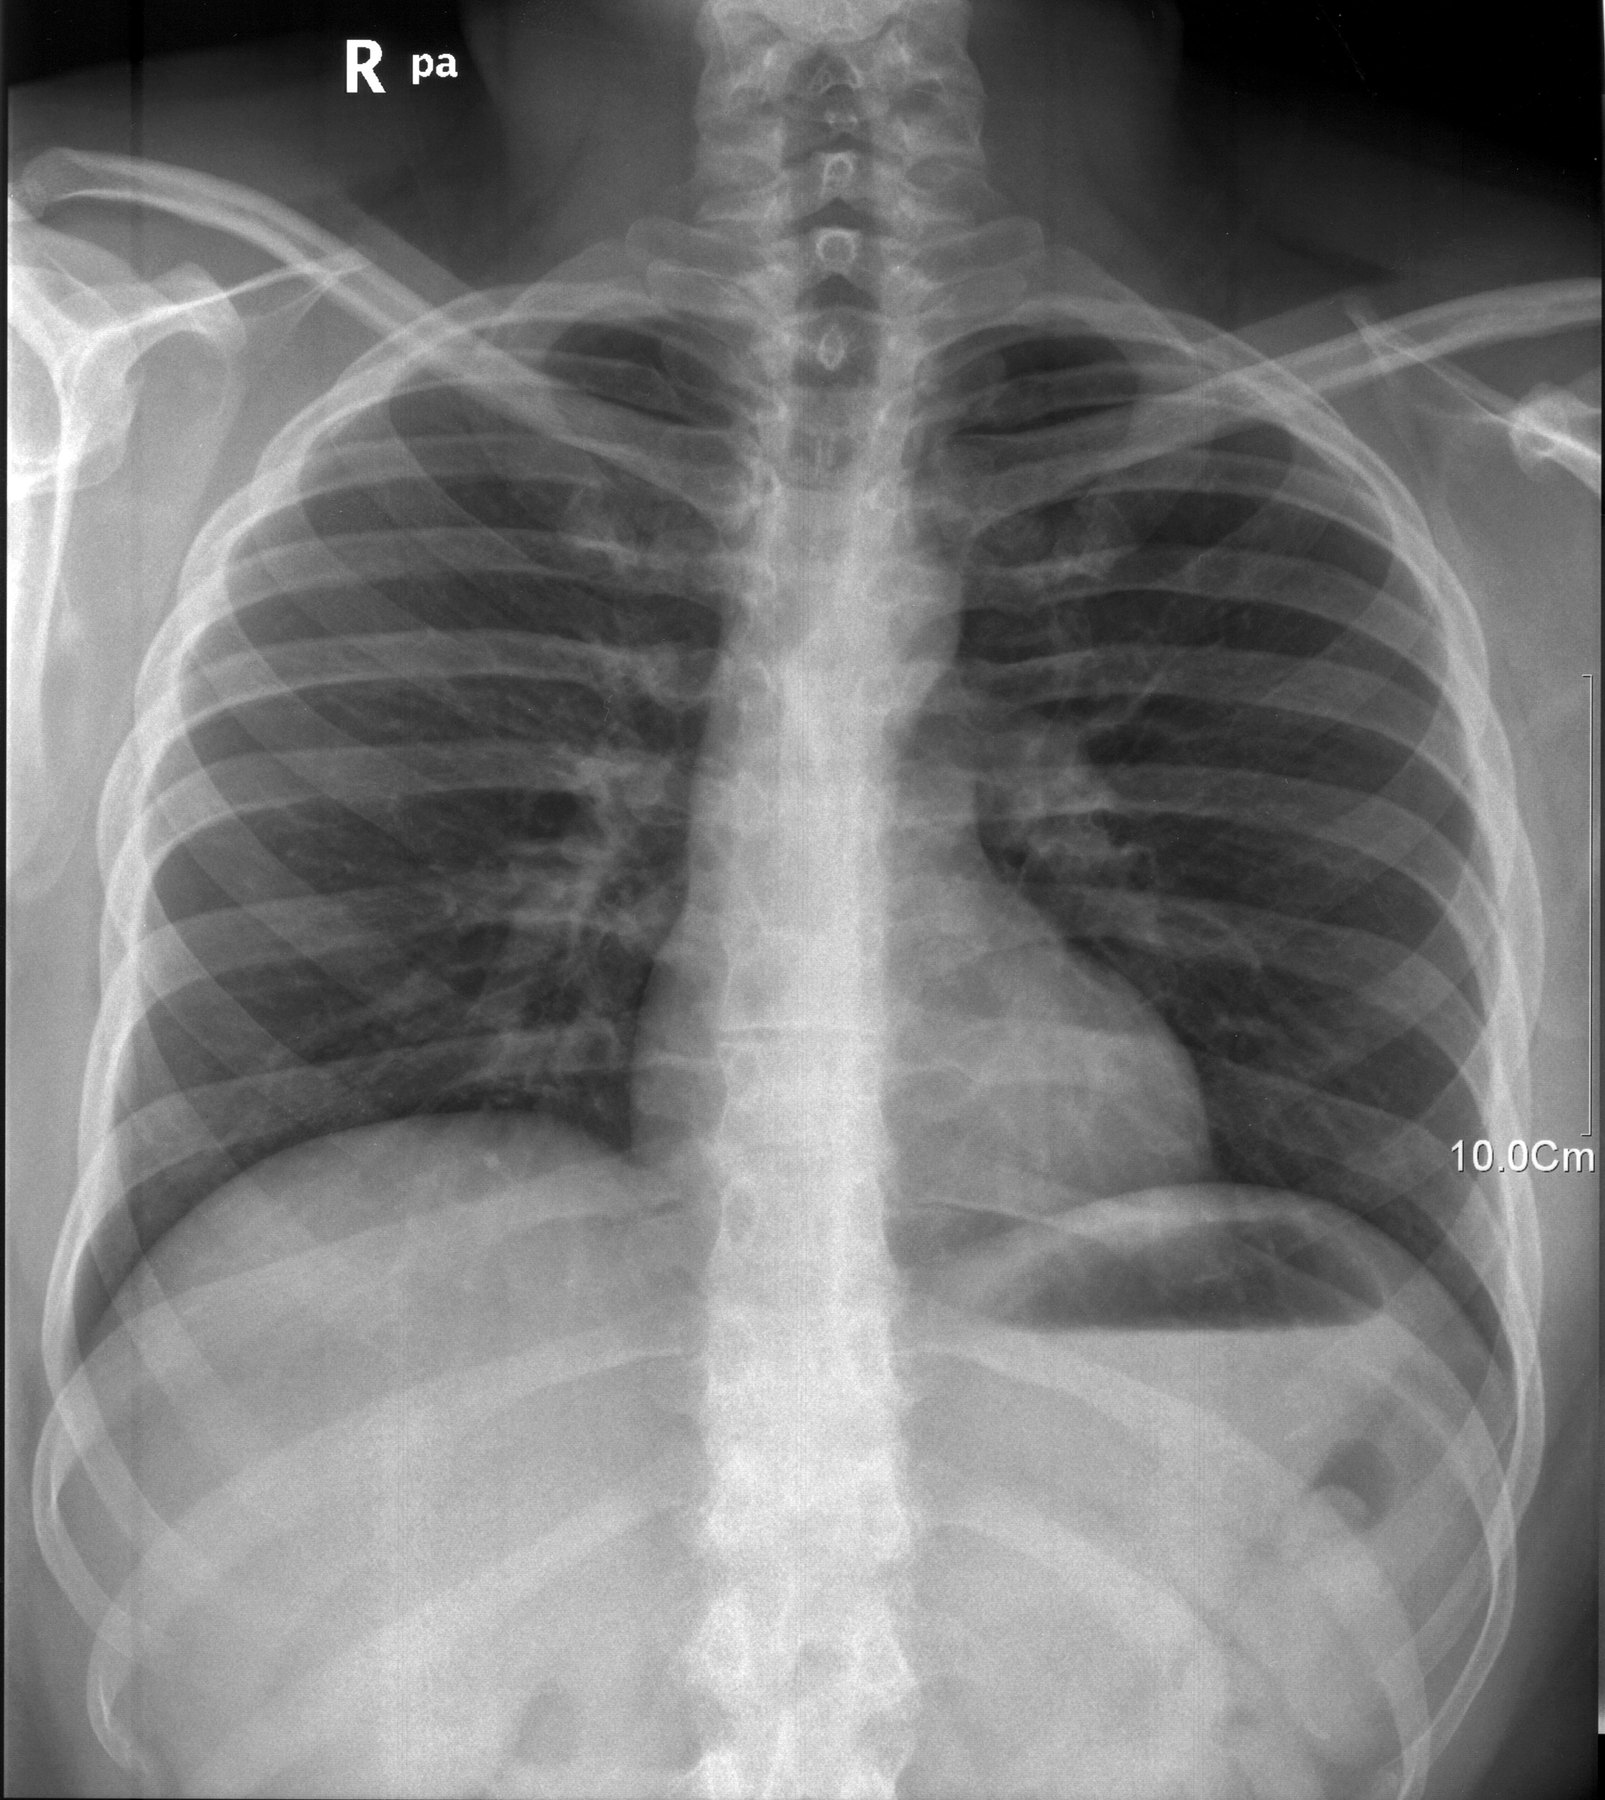
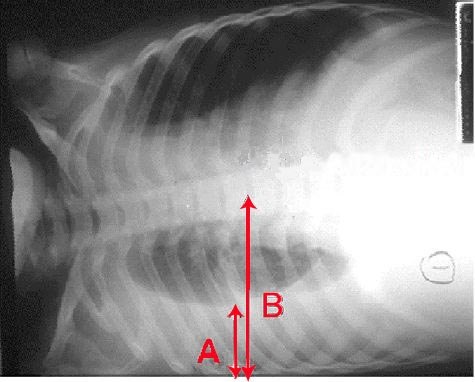
2. Where is the central ray directed for this lateral decubitus chest?
Image: CDC / U.S. Department of Health and Human Services. Public domain.
3. A PA chest suggests a small lesion in the right lung apex, but the area is obscured by the clavicle and first rib. Which additional projection BEST demonstrates the apices free of the clavicles?
4. A patient has an injury to the anterior portion of the RIGHT ribs. In addition to the PA projection, an oblique is needed to demonstrate the right axillary ribs while keeping the anterior surface of the chest closest to the detector. Which position should be used?
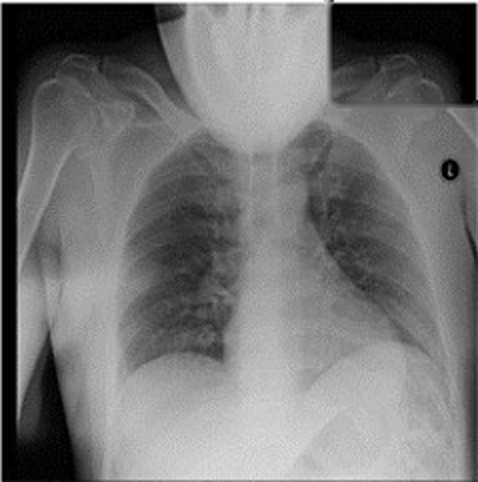
5. On this chest radiograph a large rounded soft-tissue shadow covers the top of the lungs and the upper airway. What positioning error caused it?
Image: Dasegowda G, Kalra MK, Abi-Ghanem AS, Arru CD, Bernardo M et al., Diagnostics 2023, via PubMed Central. CC BY 4.0.