
Image Production · Exposure and contrast2 min read5-question check
Exposure indicators
EI estimates receptor exposure; DI tells you how far it is from target, and plus 3 means double.
The rule
An exposure indicator is a number the digital system reports after each exposure, estimating how much radiation reached the detector in the anatomy of interest. It is not patient dose. Older systems used vendor-specific scales, some rising and some falling with exposure. The standardized system uses three terms: the exposure index, EI, which rises in proportion to receptor exposure; the target exposure index, the value the department wants for that exam; and the deviation index, DI, which tells you how far this image is from target.
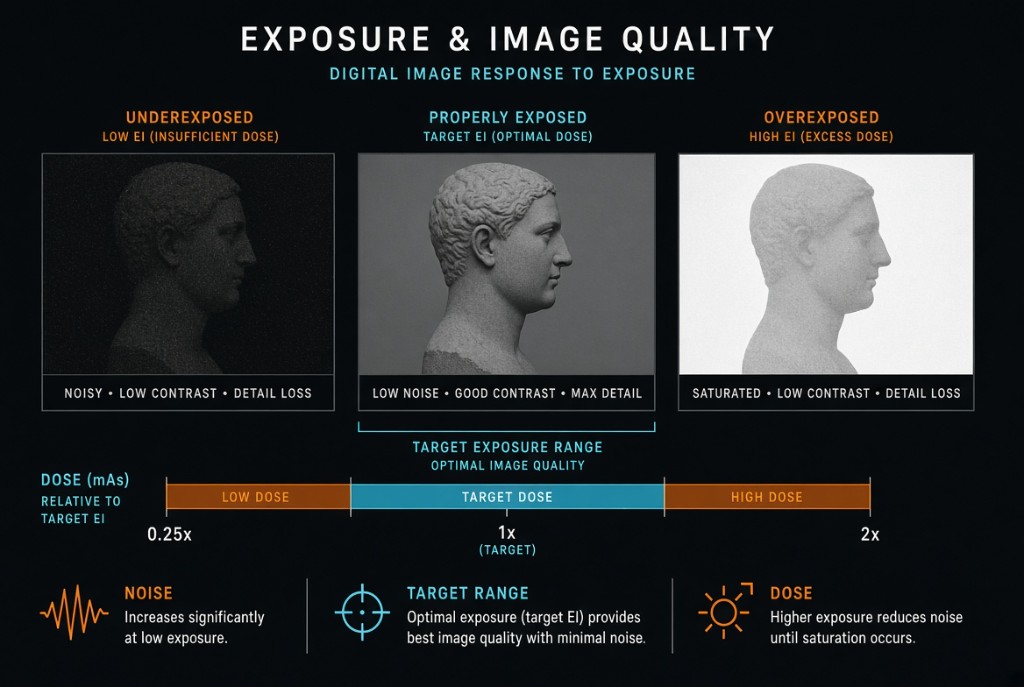
Exposure Indicators and Image Quality
The numbers
DI equals 10 times the logarithm of EI divided by the target EI. A DI of 0 is exactly on target. Plus 1 is about 26 percent more exposure than intended, plus 3 is double, and minus 3 is half. Worked example: the target EI is 400 and the image shows 800. Eight hundred divided by 400 is 2, the logarithm of 2 is about 0.3, and 10 times 0.3 is 3. DI is plus 3, so the receptor got twice the intended exposure.
Action levels
Many departments follow the AAPM-recommended (TG-116) action levels, though local values and policy may differ. A DI from minus 0.5 to plus 0.5 is the target range. Above plus 1 is overexposure; the image is repeated only if saturation has clipped needed anatomy. Above plus 3 is excessive patient exposure and calls for prompt follow-up by a supervisor. Below minus 1 the image is underexposed and may be too noisy, so the radiologist is consulted about a repeat. Below minus 3 a repeat is usually needed.
On the job
The number is only as reliable as its calculation. The system locates the anatomy by histogram analysis of the collimated area, so poor collimation, metal hardware, or choosing the wrong exam can skew it. Check the indicator on every image along with positioning and anatomy, and use the DI to adjust technique on the next exposure.
Clinical Example
A PA chest shows DI plus 3, though the image looks fine. You did not repeat it, but you note that the receptor received double the target exposure. For the next chest of similar size, you halve the mAs.
Common Mistakes
- Treating the exposure indicator as the patient's dose.
- Repeating a clear but overexposed image, which doubles the dose for no gain.
- Ignoring a high DI because the image looks good.
- Assuming every vendor's older scale moves in the same direction.
Why It Matters
The exposure indicator is the main reliable sign of overexposure in digital imaging, so it is the main defense against dose creep. The registry tests what EI and DI mean, the DI math, and the right action at each level.
Key Relationships
- DI = 10 × log (EI ÷ target EI)
- DI 0 → on target; plus 3 → double; minus 3 → half
- DI plus 1 → about 26 percent over target
- Low DI → noise; high DI → excess dose