
Image Production · Scatter, grids and filtration2 min read5-question check
Air-Gap Technique
Move the receptor away from the patient and much of the scatter misses it. The cost is magnification.
The rule
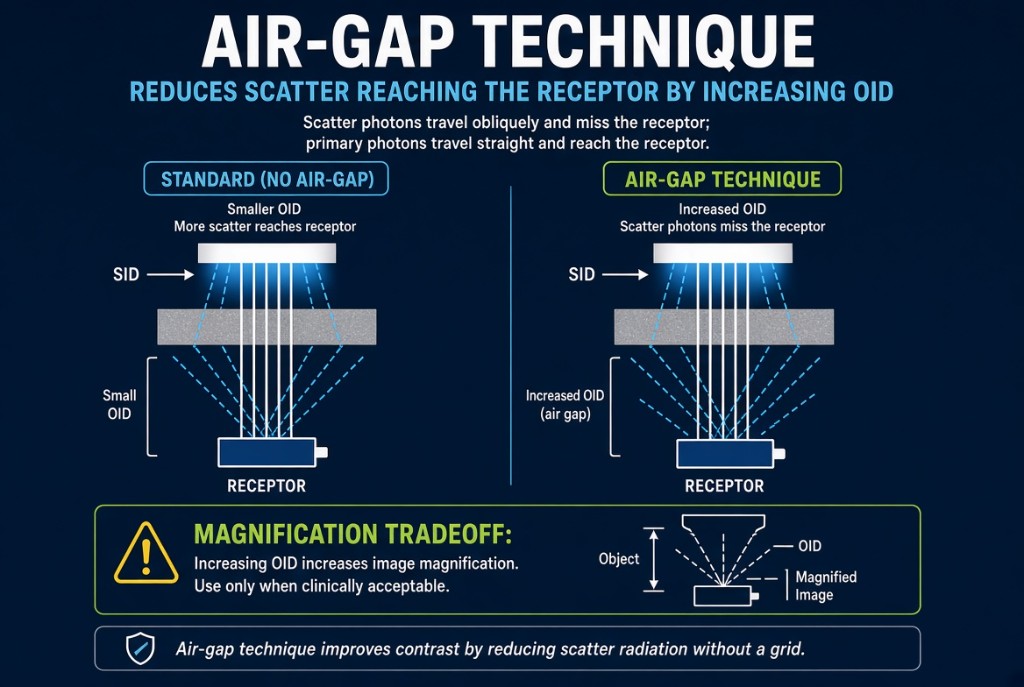
The air-gap technique increases the object-to-image distance, or OID, so that scatter leaving the patient misses the image receptor. It improves image contrast without a grid. A gap of several inches, commonly about 6 inches (15 cm), is typical when the technique is used on purpose.
Air-Gap Technique
How it works
Scatter photons leave the patient at oblique angles, while the useful primary beam travels in straight lines from the focal spot. Over a short distance, much of the scatter still lands on the receptor. Across a wider gap, more of it diverges past the receptor's edges. The air itself absorbs very little; the benefit comes from geometry, not filtration.
The numbers
A larger OID magnifies the image. Magnification factor equals SID divided by SOD, and SOD is SID minus OID. At 40 inches SID with a 6-inch gap, SOD is 34 inches and the magnification factor is 40 ÷ 34, about 1.18. Raise the SID to 72 inches with the same gap and SOD becomes 66 inches, for a factor of about 1.09. That is why air-gap exams are done at a longer SID.
In practice
The lateral cervical spine is the classic example. The shoulder holds the neck several inches from the receptor, creating a natural air gap, so it is often done without a grid at 72 inches. Because less scatter reaches the receptor, mAs must be increased compared with a non-grid exposure. Use the small focal spot when possible, since the larger OID also increases geometric unsharpness.
Clinical Example
A trauma patient in a cervical collar needs a cross-table lateral C-spine. The shoulders hold the neck about 6 inches from the receptor, so you use a 72-inch SID, no grid, and the small focal spot. The air gap cleans up scatter, and the long SID keeps magnification low.
Common Mistakes
- Believing the air in the gap absorbs scatter, when the scatter simply travels past the receptor.
- Using an air gap at 40 inches SID and accepting heavy magnification and blur.
- Leaving mAs unchanged and getting a low exposure indicator because less scatter reaches the receptor.
- Assuming the air gap improves spatial resolution, when the larger OID actually reduces it.
Why It Matters
An air gap can replace a grid when a grid is impractical, but it trades magnification and blur for contrast. The registry tests how it removes scatter, its geometric costs, and why SID is increased.
Key Relationships
- Increase OID → less scatter reaches the receptor → higher image contrast
- Increase OID → more magnification and geometric unsharpness
- Increase SID → offsets air-gap magnification
- Magnification factor = SID ÷ SOD